

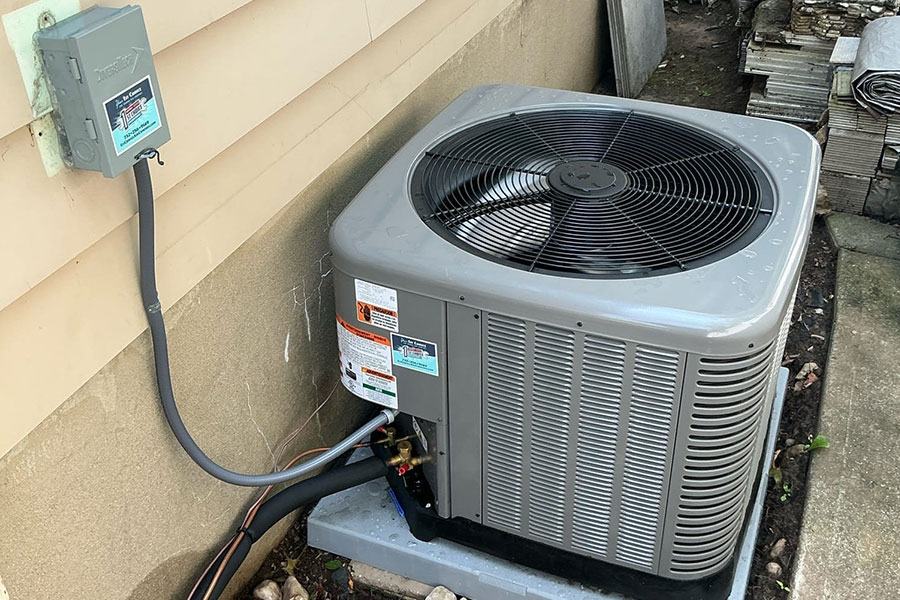
Before calling an AC technician in Manasquan, NJ, we recommend checking a few key things. First, inspect the air filter and replace it if it’s dirty. Next, verify the thermostat is set properly, and the batteries are good. Listen for unusual noises that could indicate an issue with the blower, compressor, or refrigerant. Examine the outdoor condenser unit for debris blocking airflow. Test the electrical connections and look for refrigerant leaks. If these simple checks don’t resolve the issue, then it’s time to call in the professionals. Delving deeper into these troubleshooting steps can help diagnose the problem.
Check the Air Filter
Your air filter is one of the first things you should check when dealing with an air conditioning issue. A clogged or dirty filter can restrict airflow, causing your AC unit to work harder and less efficiently. This can lead to higher energy bills and even potential damage to your system.
We recommend checking your air filter monthly and replacing it every 1-3 months, depending on usage and indoor air quality. A clean, unobstructed filter helps your AC run at peak performance, keeping you cool and comfortable all summer long.
Taking this simple step can save you time, money, and hassle down the road. Regular AC & furnace air filter replacement ensures optimal system performance and improved indoor air quality.
Inspect the Thermostat for Proper Settings
Next, let’s inspect the thermostat for proper settings. Ensuring your thermostat is functioning correctly is indispensable for maintaining ideal AC performance.
Temperature Setting: Verify that the thermostat is set to the desired temperature. If the temperature reading is higher than the set point, the AC unit won’t turn on, causing cooling issues.
Battery Check: Replace the thermostat batteries if they’re low or dead. Feeble batteries can prevent the thermostat from communicating properly with the AC system.
Programming Verification: Review the thermostat’s programming to ensure it’s set to your preferred schedule. Incorrect programming can disrupt the AC’s normal operation. Additionally, ensuring consistent comfort can help avoid unnecessary temperature fluctuations that affect your home’s atmosphere.
Listen for Unusual Noises From the HVAC System
Before you call a technician, listen carefully for any unusual noises coming from your HVAC system. Identifying these sounds can help pinpoint the problem area and guide the technician’s investigation. Pay attention to any vibrations or rattling that may indicate a mechanical issue. Notably, addressing problems early can improve efficiency and prevent unexpected breakdowns.
Identify Unusual Sounds
If your air conditioning system is making any unusual sounds, it’s important to pay attention. These noises could indicate a problem that requires professional service.
- Grinding or screeching: This could signify an issue with the blower motor or fan.
- Banging or clanking: This may be a problem with the compressor or another internal component.
- Hissing or whistling: This could mean there’s a refrigerant leak or blockage in the system.
If you notice any of these sounds, it’s best to call in a skilled HVAC technician from 1st Choice Air Comfort AC & Furnace Repair to properly diagnose and address the problem.
Pinpoint Problem Areas
In addition to listening for unusual sounds, it’s important to carefully inspect the different components of your HVAC system. Pinpoint problem areas by examining the outdoor unit, air ducts, and thermostat. Look for debris, damage, or signs of wear and tear.
Check the refrigerant lines for leaks and guarantee the condensate drain is clear. Inspect the thermostat for proper functioning and confirm it’s set to the correct temperature. By thoroughly examining your system, you can identify the root cause of any issues, enabling your HVAC technician to provide a targeted and efficient AC repair solution.
Investigate Vibrations
Can you hear any unusual noises coming from your HVAC system? Investigating vibrations is vital for identifying potential issues. Let’s explore three key things to check:
- Listen for rattling or banging sounds. These could indicate loose components or a problem with the blower motor.
- Pay attention to any high-pitched squeals. This may signal a bearing issue in the fan motor.
- Assess if the system is vibrating excessively. Excessive vibrations can lead to further damage and should be addressed promptly.
If you notice any of these vibration-related noises, it’s best to call in a professional HVAC technician to diagnose and resolve the problem before it worsens.
Examine the Outdoor Condenser Unit for Debris
Why is it important to examine the outdoor condenser unit for debris? The outdoor condenser unit is the part of your air conditioning system that sits outside your home. It’s responsible for releasing the hot air that was absorbed from inside your home.
If this unit gets blocked by debris like leaves, grass clippings, or even dirt, it can’t efficiently release that hot air. This causes your AC system to work harder, which leads to higher energy bills and potentially a breakdown.
That’s why we recommend regularly checking the condenser unit and clearing away any obstructions. It’s a simple maintenance task that can go a long way in keeping your AC running smoothly all summer long. Additionally, a well-maintained unit can help improve your indoor air quality solutions, ensuring a healthier living environment.
Test the Electrical Connections for Proper Function
After checking the outdoor condenser unit, the next important step is to test the electrical connections for proper function. This can help identify any issues with the wiring or electrical components that may be causing your AC unit to malfunction.
Inspect the circuit breaker to guarantee it hasn’t tripped, which could indicate an electrical problem.
Check the thermostat to confirm it’s set to the correct temperature and is properly communicating with the AC unit.
Examine the wiring connections at the outdoor unit and indoor air handler, looking for any signs of damage or loose connections.
Inspect for Refrigerant Leaks Around the System
Refrigerant leaks can drastically impact your air conditioning system’s efficiency.
We’ll want to inspect the condenser unit and evaporator coil for any signs of leakage. Identifying and addressing these leaks is pivotal to maintaining your system’s proper function.
Identify Refrigerant Leaks
If your air conditioner isn’t cooling your home as it should, one of the first things we’ll want to inspect for is refrigerant leaks. Refrigerant is the substance that absorbs heat from the air inside your home and transfers it outside.
Leaks can occur in various places, such as:
- Copper refrigerant lines: Look for signs of wear, damage, or corrosion.
- Coils: Check the indoor and outdoor coils for any cracks or holes.
- Connections: Verify all fittings and connections are tight and not leaking.
Identifying and repairing refrigerant leaks is indispensable to restoring your AC’s cooling efficiency and preventing further damage to the system.
Check Condenser Unit
Next, we’ll want to take a close look at the condenser unit itself. Inspect the condenser coil for any signs of damage or wear. Look for bent fins, debris buildup, or evidence of a refrigerant leak. If you notice any leaks, you’ll need to call in a professional to properly diagnose and repair the issue.
While you’re at it, guarantee the condenser fan is running properly and the unit is clean. A dirty or malfunctioning condenser can severely impact your AC’s efficiency and performance. Take the time to thoroughly inspect this critical component—it could save you from a costly repair down the line.
Inspect Evaporator Coil
While examining the condenser unit is pivotal, we must also take a close look at the evaporator coil. The evaporator coil is responsible for absorbing heat from the indoor air, so it’s essential to inspect it for any signs of refrigerant leaks.
Look for ice buildup on the coil, as this can indicate a refrigerant leak or airflow issue.
Examine the coil for any visible cracks or damage that could be causing a leak.
Listen for any hissing or bubbling sounds, which may signify a refrigerant leak.
If you notice any issues with the evaporator coil, it’s best to call a professional HVAC technician to diagnose and resolve the problem.
Assess the Airflow Throughout Your Home
Before scheduling an AC repair visit, it’s important to assess the airflow throughout your home. Poor airflow can drastically impact your AC’s efficiency and cause issues.
Start by checking if all your vents and registers are open and unobstructed. Guarantee that furniture, curtains, or other items aren’t blocking the airflow.
Next, walk through your home and feel the airflow from each vent. If some vents aren’t blowing air strongly, there could be a blockage or airflow issue.
Finally, check your air filter—a clogged filter restricts airflow and forces your AC to work harder. Replace the filter if it’s dirty.
Addressing airflow problems can improve your AC’s performance and prevent future breakdowns.

Conclusion
If these troubleshooting steps don’t get your AC back up and running, don’t hesitate to call the experts at 1st Choice Air Comfort. Our certified technicians will quickly diagnose and resolve the issue, restoring your home’s comfort. We’re available 24/7 for emergency AC service—because your satisfaction is our top priority, not just another job.